Part 6: how to build
Once you have figured out how many garden beds you want and the construction material you want to use, you can start designing. You can really make the beds any size you want but I would encourage you to (1) make them all the same size and (2) make them either 8 feet by 4 feet or 4 feet by 4 feet.
By keeping it to these two sizes you can always buy 8 foot long boards and cut things in half. They are easy to transport in a minivan (and even in a car if you get creative). There are multiple other reasons to keep them this size:
Once we start talking about tarps and greenhouse coverings you’ll see the advantage of having all your beds exactly the same size (I very much regret not doing this).
Anything wider than 4 feet makes it difficult to reach the middle without stepping in, which you really should avoid. Keep this in mind too if you are jamming these against a fence. In that case, you might consider making them 3 feet wide if you are making 8 footers. When in doubt go outside with a tape measure and test things out. I find that 4*4 beds against a fence work fine as long as you leave space to walk on 3 sides.
Next you need to figure out how deep to make your garden boxes. There is lots of advice online and I find most of it very confusing and somewhat misleading.
If you are placing your beds over soil in your yard you only need the raised bed to be ~6 inches high If you build them this way, I do suggest that you dig up the soil underneath to allow for drainage and roots to penetrate the hardpan soil. So the ~6-inch high bed will be a bit more work as you do have to do some digging.
If you are placing them over concrete or if you want to save yourself some digging you can make them ~11 inches high. This I find works really well for carrots in our area since the native soil is clay. Just remember that with this option you’ll also need to purchase and move more soil to fill the bigger box.
I’ve built all the models I describe here and I haven’t seen much difference in terms of vegetable production. Maybe the higher type of beds have worked better for daikon (radish) which grow really big and deep, but I think that’s about the only discernible difference. BUT remember that you need to dig into the native soil if you build the ~6 inch beds. And even for the 11 inch beds I recommend digging down a bit to help with drainage.
I have written this next section 18 times because I find it confusing to write about the construction of garden beds. So keep these ideas in mind and then see the pictures I drew below. I won’t go into all of it because there are so many things online. But here are some thoughts:
Remember that lumber is sold in "nominal dimensions”. So a 2 inch by 6 inch board is actually 1.5 inches by 5.5 inches. And the 4 inch by 4 inch board is actually 3.5 inches by 3.5 inches. This matters when you start calculating out your measurements.
You can either make the beds with 2 inch by 6 inch (2x6) boards that you fasten together at the corners; or you can make them with 4 inch by 4 inch (4x4) boards that you overlap and secure together with timber screws.
Building the beds from 4x4 lumber is the easiest and lasts longer but it is a bit more expensive. One 10.5 inch high 8 foot by 4 foot bed will cost you about 110 dollars just for the wood (untreated fir/pine from a home improvement store).
Building the beds from 2x6 lumber is a bit cheaper but they won’t last as long, will lose their shape more easily, and require a bit more work to build. One 11-inch high 8 foot by 4 foot box will cost you about 50 dollars just for the wood (untreated fir/pine from a home improvement store).
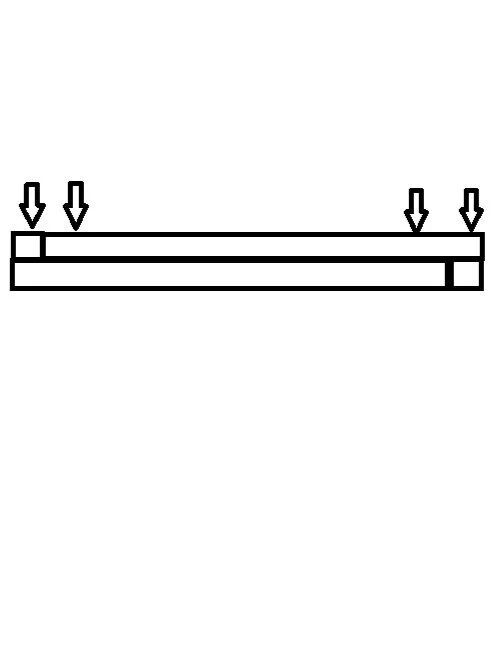
Building 4x4 beds: two layers gets you a 7 inch deep bed; three layers gets you a 10.5 inch deep bed. Cut one board in half (4 feet each); leave the other 2 at 8 feet. Lay them out as shown below:

First layer of a 8x4 foot bed using 4 inch x 4 inch timbers
The cool part about this type of bed is that the second layer is going to hold everything together because you overlay them the opposite way and secure it all down with 6-inch timber screws. The only trick before putting in the timber screws is that you probably want to drill a hole to counter-sink the heads a bit otherwise they will stick out too far (search online for what I mean is you haven’t done it before). So then lay the second layer like below (this is a side view obviously). The arrows are where you will put in the timber screws. This will secure it all together. If you are doing 3 layers for an 11-inch bed then just add another layer but offset from your second layer. Piece of cake!
Second layer of a 8 foot by 4 foot bed using 4x4 lumber.
Bed using 2inch by 6 inch boards. This type of bed takes a bit more work. You need to create some type of wood to hold the corner pieces together. Using a 2x4 cut to size works. So if you are doing 5.5 inch high beds in this case cut 4 pieces of 2x4 into 5 inch pieces. If you are doing a 11 inch high bed then cut 4 pieces of 2x4 into 10.5 inch pieces. These will serve to connect your corners. See the below picture. The arrows are pointing to where you would put the 2x4 pieces to secure the corners. Then use deck screws to put all the pieces together. I recommend 6 screws for each corner


Corner of a 2x6 garden box (interior 2x4 to hold the corners as described above). If you were building an 11-inch box you would just add another layer (and your corner bracket would have been taller).
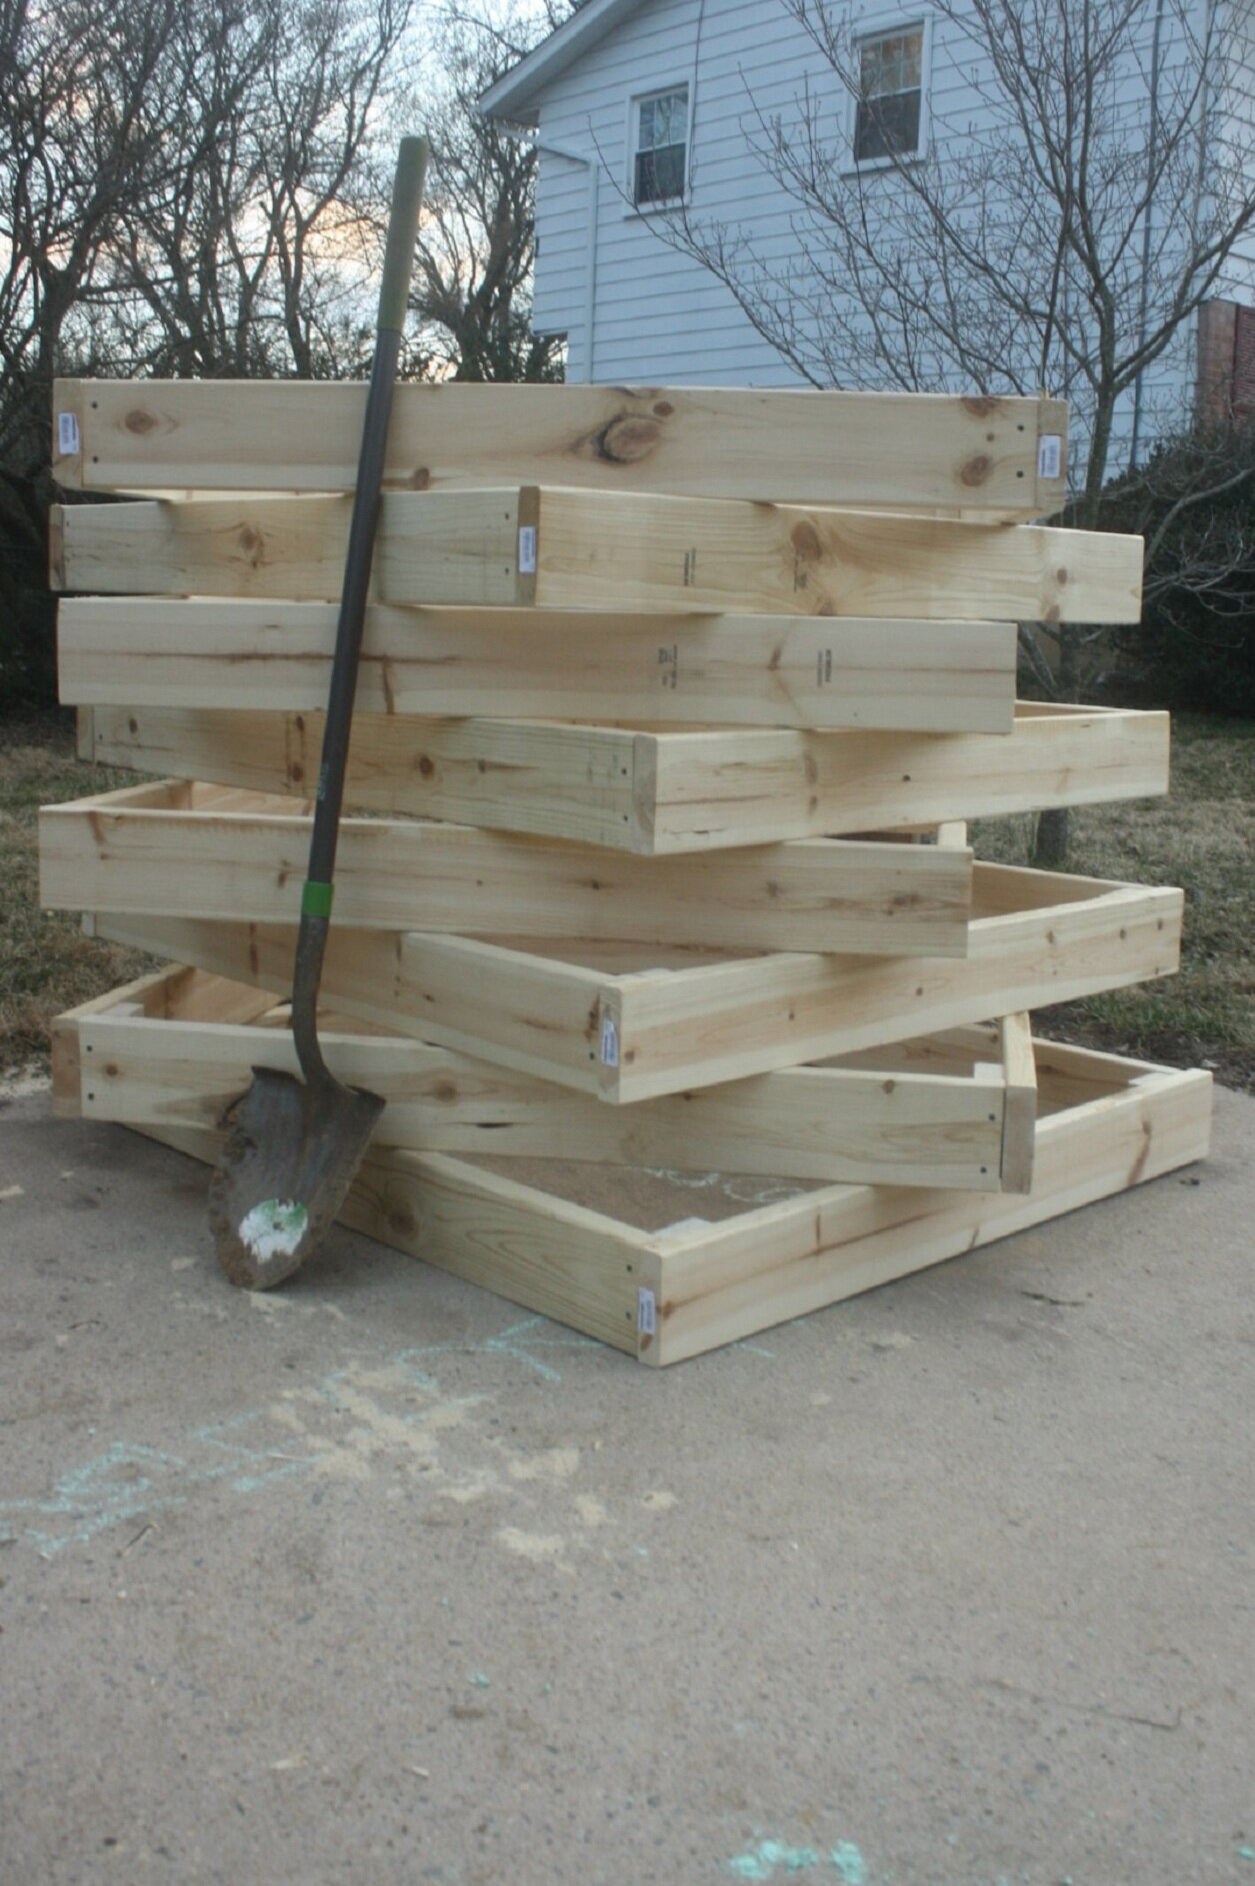
8 4feet by 4feet boxes ready to install at a community garden. I built them at home and then packed them into the minivan and elementary-aged kids carried them to the garden plot.

The beds installed at a community garden plot. Cucumbers growing on the left in the middle of summer.
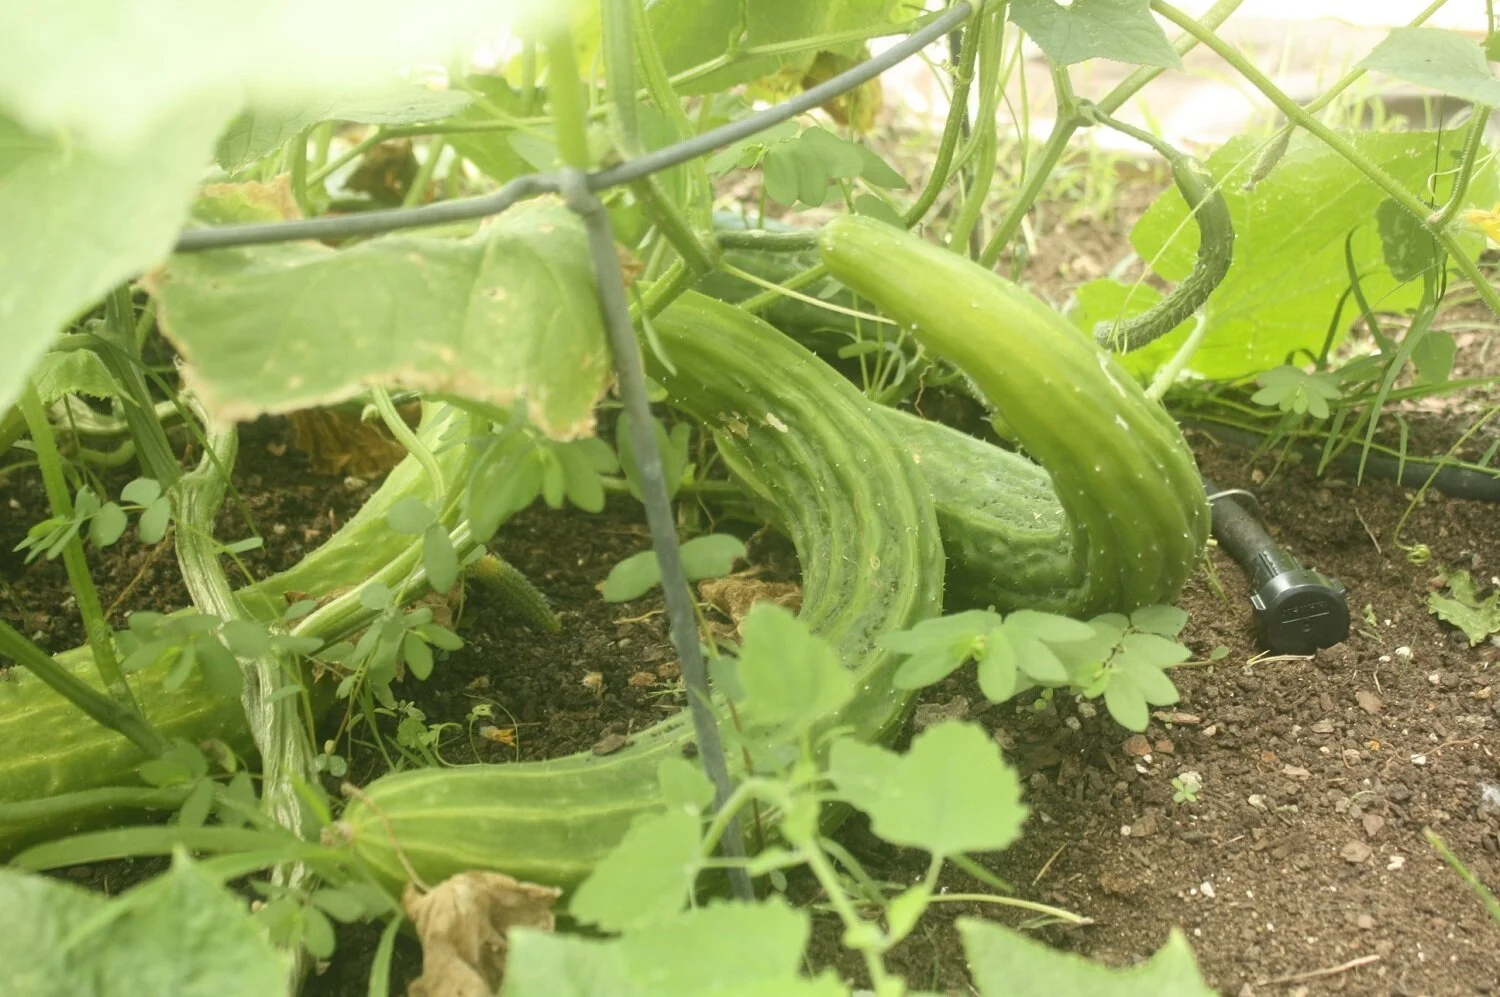
Closer look at the Suyo Long cucumbers growing in the garden pictured above. Suyo Long are a delicious variety that is impossible to find unless you grow yourself.